
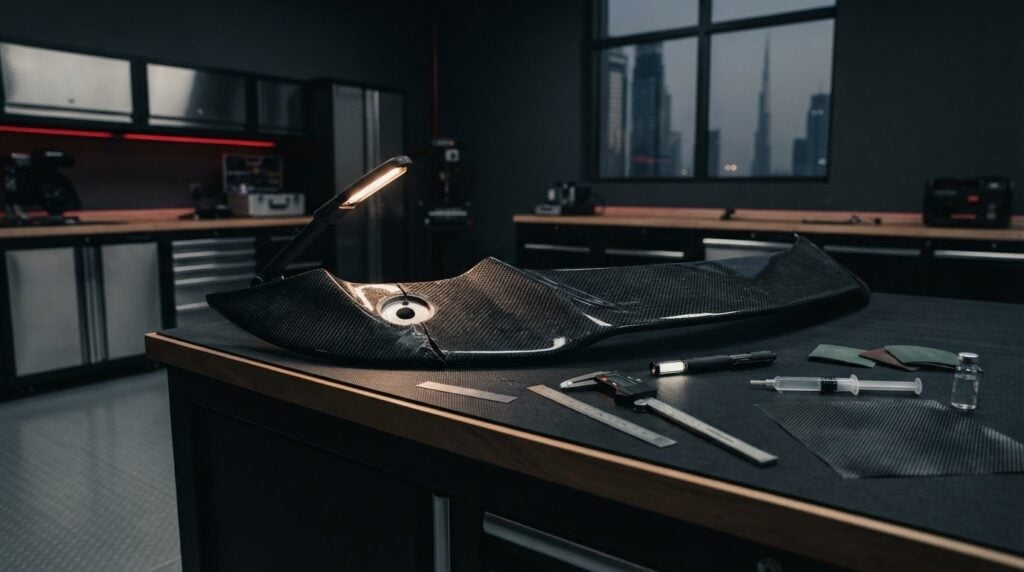
A crack doesn’t automatically mean a carbon-fiber splitter must be replaced. The cost to repair a cracked carbon fiber splitter depends on the crack’s depth and location, the condition of nearby mounting points, and the work needed to restore the finish. The price depends on the damage and repair scope, including any refinishing required, and is provided after a quote request. A small surface crack may be repairable, while a deep split, damaged mount, or distorted edge calls for a more cautious assessment.
It’s understandable to want a clear answer before deciding whether to repair or replace a performance part. This guide explains how to distinguish cosmetic damage from potential structural failure, what affects repair complexity, and how small cracks are typically addressed. It also covers warning signs that make professional inspection important and when replacement may be the more practical option.
Key Takeaways
- Inspect both sides of the splitter, especially around mounting holes and supports, to distinguish surface damage from signs of stress or delamination.
- White stress marks, torn weave, deep splits, and distorted or separated edges call for a more cautious assessment than a superficial clear-coat scratch.
- Repair materials and resin need to suit the original laminate; preparation, reinforcement, and controlled curing all influence the result.
- Small-crack repairs involve careful sanding, epoxy application, curing, and refinishing, while damage to mounts or structural areas may make replacement the safer option.
- Once the splitter’s condition is addressed, Paint Protection Film can help protect vehicle surfaces from everyday exposure and preserve their finish.
How to Fix Carbon Fiber Cracks: Repair or Replace?
Use four checks to distinguish finish damage from a compromised laminate: the crack’s position, visible weave, mounting points, and the splitter’s overall shape.
-
Inspect the Splitter Visually and by Tap
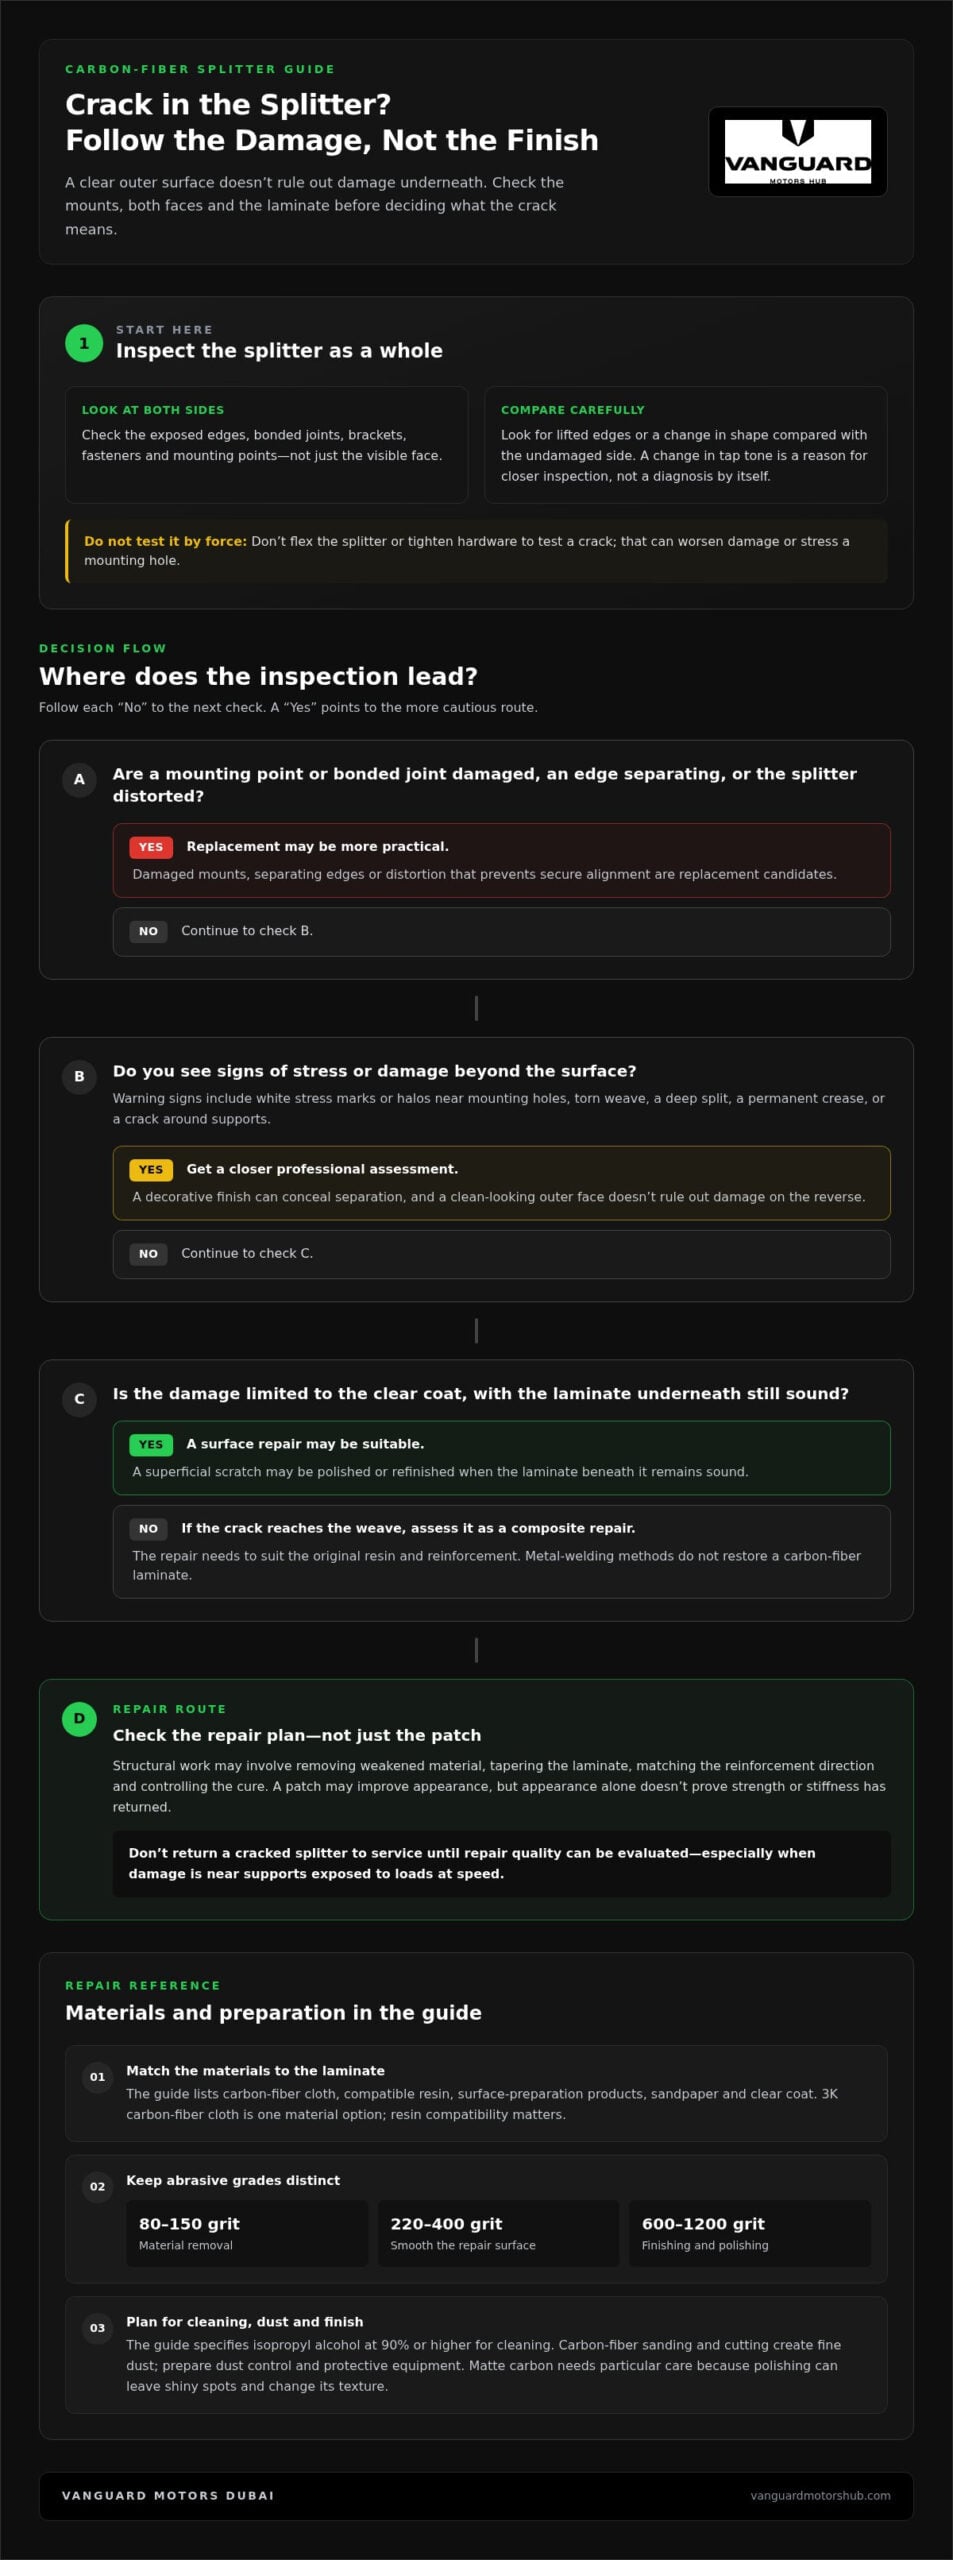
Examine both faces, exposed edges, bonded joints, brackets, fasteners, and every mounting point. White lines or halos around mounting holes can signal concentrated stress in the resin. Look for clear-coat damage, lifted edges, and changes in shape, then compare them with the undamaged side.
Lightly tap the suspected area and nearby intact sections, comparing the sound. Treat a change in tone as a reason for closer inspection, not a diagnosis on its own. Don’t flex the splitter or tighten its hardware to test it; force can worsen a crack or stress a mounting hole.
-
Distinguish Cosmetic Cracks from Structural Damage
Check whether the damage is limited to the clear coat or reaches the carbon-fiber weave. A superficial scratch may be polished or refinished if the laminate underneath remains sound. Torn weave, a deep split, or a permanent crease, by contrast, can indicate lost structural capacity.
Pay special attention to white stress marks near mounting holes and cracks around supports or chassis mounts. A clean-looking outer face doesn’t rule out damage on the reverse. Inspect both sides and nearby attachment points before classifying a crack as cosmetic; a decorative finish can conceal a more serious separation.
-
Match the Repair Method to Damage Severity
Choose a repair method based on the inspection. A surface-only blemish may need refinishing, while a crack through the laminate requires a composite repair suited to the original resin and reinforcement. Carbon-fiber parts consist of fibers held in a resin matrix, so metal-welding methods won’t restore their construction.
Repair becomes more complex when damage reaches an edge, mounting hole, or bonded joint. A structural repair may require removing weakened material, tapering the laminate, matching the reinforcement direction, and controlling the cure. A patch over a crack may improve appearance, but appearance alone doesn’t prove that strength or stiffness has returned.
-
Decide When Replacement Is Needed
Replace the lip when mounting points are damaged, edges are separating, or substantial distortion prevents secure alignment. A front lip broken into 3-4 large pieces is a replacement candidate. Don’t return a cracked splitter to service until repair quality can be evaluated, especially when damage is near supports exposed to loads at speed.
In the UAE, motor-insurance coverage depends on the policy wording and claim circumstances; carbon-fiber construction alone doesn’t determine coverage. When assessing a repair shop’s suitability, look for a process that inspects both faces and mounts, identifies laminate damage, and explains the proposed reinforcement and finish. Clear reasoning matters more than a cosmetic patch.
Carbon-fiber repair materials
Choose materials to suit the splitter’s laminate, damage, and intended finish. The right combination affects adhesion, appearance, and how well the repair integrates with the original part.
-
Identify the Repair Tools and Materials
List the materials before starting: carbon-fiber cloth, compatible resin, surface-preparation products, sandpaper, and clear coat. A 3K carbon-fiber cloth is one repair material; resin compatibility matters because the repair system must suit the original laminate. For cleaning, the guide specifies isopropyl alcohol at 90% or higher.
Prepare sanding tools for each stage. Coarse 80-150 grit removes material, while 220-400 grit smooths the repair surface. Fine 600-1200 grit supports finishing and polishing. Keep these grades separate so coarse abrasive doesn’t scratch a prepared finish.
- Match the reinforcement to the damaged area. Carbon cloth and resin form a composite repair, while a kit may include some of the required materials. Check the kit contents against the planned work before buying; missing resin or suitable cloth may mean another purchase and delay.
Include finishing materials in the plan. A repair that restores the surface may still need clear coat to blend its appearance. Matte carbon needs particular care: polishing it can create shiny spots and permanently change its texture.
- Prepare a clean, controlled work area before opening resin. Sanding and cutting carbon fiber create fine dust that shouldn’t be inhaled or spread around the workspace. Organize tools, cloth, and resin containers, and follow each material’s handling and curing directions.
Set aside protective equipment and dust control along with the repair materials. Resin, sanding abrasives, and carbon cloth serve different purposes; substituting one for another won’t reproduce the intended laminate. Don’t cut or sand until the material plan and work area are ready.
-
Estimate DIY Material Costs
Build a DIY materials estimate by listing the carbon cloth or repair kit, compatible resin, preparation products, abrasives, and refinishing supplies. The total depends on which items you already have, the amount of reinforcement needed, and whether the finish requires clear coat.
Separate materials from tools when comparing options. A kit may include some repair components, while sanding equipment or polishing supplies may need to be purchased separately. For professional work, the price depends on the damage, materials, and finish requirements, and is provided after a quote request.
- Compare the repair plan with the finish you want before buying. A visible weave repair may call for careful cloth alignment and refinishing; an underside reinforcement has different appearance priorities. For project-specific guidance, discuss carbon-fiber repair before committing to materials.
Keep the original splitter’s finish in view throughout the repair plan. Mismatched resin, poorly aligned cloth, or aggressive polishing can leave the repair visibly different, even when the surface feels smooth.
Small-crack sanding, epoxy, curing and refinishing
Follow the epoxy system’s instructions through preparation, application, curing, and finishing. Each stage affects how the repair bonds and how closely its appearance matches the original surface.
-
Sand the Small Crack
Prepare a repair zone extending approximately 25-30 mm around the crack. Use 80-120 grit to create a surface that can accept the repair, then refine it with 200-400 grit before applying resin. Keep sanding controlled: removing too much material can expose more of the laminate and increase the repair area.
Contain the fine dust created by carbon-fiber sanding and avoid spreading it through the work area. Assess the surface as you go. The aim is to prepare the crack and surrounding sections for adhesion, not to alter the splitter’s shape or remove sound material unnecessarily.
-
Apply Epoxy Resin
Use an epoxy compatible with the splitter’s original resin; epoxy parts should be repaired with epoxy. Work the material into the prepared crack, following the product’s mixing and application directions. For a small crack, the guide recommends applying 2-3 epoxy coats, allowing each layer to build without flooding the surrounding finish.
Keep the repair zone even and avoid trapping air in the resin. Uneven layers can affect the surface and make later sanding more difficult. If the crack extends beyond a small surface repair, adding resin alone won’t establish that the laminate’s strength has been restored.
- Control the cure before sanding or refinishing. A temperature-controlled area around 24°C-32°C is recommended for curing carbon-fiber repairs. Most room-temperature epoxies require 24-48 hours for a full cure; some systems require 24 hours before sanding and 72 hours for full strength.
Use the epoxy manufacturer’s cure schedule as your reference, since systems differ. Don’t sand resin that remains soft or tacky. Cure time and temperature determine when the repair can move to the next stage, so rushing can compromise the finish.
-
Refinish the Repaired Area
Once the resin has cured, sand the surface progressively rather than jumping straight to polishing. Wet-sand through 400, 600, 1000, 1500, and 2000 grit before polishing. This sequence refines the cured repair in stages and helps reduce visible sanding marks.
Apply 2-3 light coats of automotive clear coat to refinish a small crack repair. Match the surrounding surface carefully, especially on matte carbon, where polishing can create shiny spots and permanently change the texture. Sanding through clear coat can expose resin and weave to contamination and faster ultraviolet damage.
Structural reinforcement and repair feasibility
Assess whether the crack affects only the finish or passes through load-bearing laminate. Repair feasibility depends on the damaged layers, reinforcement layout, resin compatibility, and control of the curing process.
A smooth finish or decorative patch doesn’t demonstrate that the splitter’s original strength and stiffness have returned. Strength and durability depend on repairing the laminate, matching the reinforcement direction, using compatible resin, and controlling the cure.
-
Identify Clear-Coat and Structural Cracks
Inspect the crack under good lighting and compare the clear coat with the exposed weave. A superficial scratch may be refinished if the laminate beneath remains sound. Look for layer separation, known as delamination, or a crack crossing the weave; those signs indicate more than surface damage.
Check the reverse face and nearby mounting points too. The clear coat can look smooth while underlying layers separate, so assess the entire component, not just its visible face.
-
Assess Repair Feasibility
Map the damage before choosing reinforcement. Structural work may require removing weakened material, tapering the laminate, matching the original fiber direction, and controlling the resin cure. A small cosmetic component has different demands from a splitter crack near a support, where stiffness and load transfer matter.
Use the original laminate direction when it is known. Repair plies oriented at 0°/90° and ±45° can match different fiber directions. Resin compatibility also matters: epoxy components require epoxy repair resin.
-
Reinforce the Damaged Area
Prepare reinforcement to overlap the damaged area by at least 25 mm on all sides. For semi-structural parts, use 3-4 carbon-fiber patch plies; orient them to match the original laminate when its direction is known. Apply resin and control the cure rather than relying on a surface patch.
For non-structural components, a repair may prioritize a smooth surface and visible finish. Structural reinforcement has a different task: rebuilding load-bearing layers. Test-fit and align the component without force before bonding or tightening hardware. Washers and backing hardware help distribute clamping pressure.
-
Evaluate Repaired Strength and Durability
Evaluate the repair by examining the bonded area, edges, mounting points, and opposite face. A decorative patch bonded over a crack can conceal the damage without proving that strength has been restored. A glossy or polished finish also says nothing about the reinforcement beneath the clear coat.
Keep the splitter out of service until the repair has been evaluated. Check whether the repaired laminate remains aligned, whether edges have separated, and whether the mounting hardware sits without force. Restoring appearance alone doesn’t establish structural durability.
When professional inspection or replacement is safer
Choose professional inspection when cracks reach supports, mounting points, bonded edges, or visibly distorted sections. Compare the repair scope with replacement before returning the splitter to normal vehicle use.
-
Review Real-World Repair and Replacement Examples
Model-specific examples can show why damage details matter. Historical Corvette cases describe owners weighing repair against replacement, with different shops and parts sources presenting different options. They illustrate why one quote cannot represent every vehicle or carbon-fiber part.
Compare the damage itself, not just the model name. A crack away from a mount differs from a broken edge or separated support. Note whether the repair would remove damaged laminate, restore attachment points, and refinish visible carbon. An example is useful only when its damage pattern resembles yours.
Before deciding, record the splitter’s part number, if available, and photograph both faces and each mounting point. This gives an automotive specialist a clear basis for discussing repair scope and replacement fit. Keep historical estimates in context; they don’t establish current UAE pricing.
-
Compare Repair and Replacement Trade-Offs
Ask what each option restores. A repair can retain the original component, but it must address damaged laminate and attachment points, not merely cover the visible crack. Replacement removes the damaged part and may be preferable when substantial distortion or mounting damage makes correct alignment difficult.
Compare finish and fit as well as structural work. A repaired weave may remain visible, while a replacement component may differ in finish or need precise test-fitting. Check whether existing hardware sits naturally without force. Forced alignment can put new pressure on the carbon fiber and compromise installation.
Do not return a cracked splitter to service before repair quality is evaluated. If a lip is broken into 3-4 large pieces, replacement deserves serious consideration. The correct choice depends on damage extent, mount condition, repair feasibility, and whether the part can be secured as intended.
-
Weigh Repair-versus-Replacement Economics
Compare the full repair scope with the complete replacement route. Include damage removal, reinforcement, resin work, refinishing, replacement-part fit, and any hardware needs. A small accessory may require more refinishing work than replacement, while repairing a suitable component can avoid replacing sound material.
For a repair quote, the price depends on the extent of damage, reinforcement, finish, and removal or refitting, and is provided after a quote request. Compare like for like: a cosmetic patch isn’t equivalent to structural restoration, and a replacement quote must account for fit and finish.
For a UAE vehicle, share clear photographs and the splitter’s model details when arranging an assessment. To discuss carbon-fiber splitter repair, provide the damage location and mounting-point condition. That gives the repair discussion a practical starting point.
Vanguard Motors Dubai: Paint Protection Film (PPF) Installation
Vanguard Motors Dubai installs Paint Protection Film (PPF) for vehicle owners looking to protect exterior surfaces after addressing splitter damage. PPF is a protective measure, not a repair method: a cracked splitter needs assessment and appropriate repair or replacement before protection is considered.
Once the damaged part is addressed, PPF can help preserve the finish of protected vehicle surfaces against everyday exposure. For a different appearance, Vanguard Motors Dubai also offers Colored Sticker Wraps and Peelable Paint Applications. The right option depends on whether your priority is surface protection or a visual change.
Contact Vanguard Motors Dubai to discuss Paint Protection Film (PPF) Installation, or visit vanguardmotorshub.com.
Make the Next Move with Confidence
Turn the inspection into a clear plan for your vehicle: decide whether your priority is restoring the splitter, protecting exterior surfaces, or refining the overall appearance. The cost to repair a cracked carbon fiber splitter depends on the damage, repair scope, and refinishing required; pricing is provided after a quote request.
Once the splitter is addressed, choose an exterior finish strategy that suits how you use and present your car. Vanguard Motors Dubai offers Paint Protection Film (PPF) installation, Colored Sticker Wraps, and Peelable Paint Applications. These options serve different goals, from surface protection to a visual change, without replacing structural repair.
Share the vehicle and damage details with Vanguard Motors Dubai to discuss a practical next step. Contact Vanguard Motors Dubai and move forward with a plan that respects both performance and finish.
Frequently Asked Questions
Can You Repair a Broken Front Lip at Home?
Yes, a competent DIY repair may suit a small, accessible crack in a non-structural area. Remove the lip only if you can do so without stressing its mounts, then inspect the reverse side and attachment points. A split through the weave, a loose mounting area, or an uncertain laminate condition calls for professional assessment. A neat surface patch alone doesn’t establish that the lip is safe to use.
What Causes a Front Lip to Break?
Impact is a common cause: a front lip can strike a curb, steep driveway transition, road debris, or another obstacle. Incorrect fitment can also create stress if the part is forced into alignment or fasteners clamp unevenly. Repeated contact may turn a small chip into a larger fracture. After an impact, inspect the underside and mounts, as damage may extend beyond the visible break.
When Should You Replace the Front Lip Instead of Repairing It?
Choose replacement when the lip is broken into several large pieces, badly distorted, or has mounting damage that prevents secure fitment. Extensive edge separation can also make a dependable repair impractical. Compare the replacement part’s fit and finish with the repair scope, not just the visible damage. A splitter that cannot sit correctly on the vehicle shouldn’t be returned to use.
How much does it cost to repair a cracked carbon fiber splitter in the UAE?
The cost to repair a cracked carbon fiber splitter in the UAE depends on the crack’s location and depth, laminate damage, mount condition, reinforcement, and refinishing. A quote request is needed to price the specific repair; no single figure applies to every splitter and damage pattern. To request an estimate, provide the vehicle details and clear photographs of the damaged area, reverse face, and nearby attachments.
What is the typical price to replace a cracked carbon fiber splitter in the UAE?
Replacement pricing depends on the vehicle and splitter specification, part availability, fitment requirements, and finish. A custom or model-specific lip may involve different sourcing and installation needs from a standard component. In the UAE, compare a quote for the correct replacement part with the complete repair scope. Don’t compare a bare part price with repair work that includes refinishing or refitting.
What factors affect the cost of repairing a carbon fiber splitter?
Repair cost varies with the damage location and crack depth, the amount of delaminated material, and whether mounts or edges need attention. Labor also depends on access, preparation, reinforcement, resin work, curing, and matching the existing finish. For example, a crack on an exposed face may require more cosmetic refinishing than an underside repair. A clear description of the damage helps define what a quote includes.
Can a cracked carbon fiber splitter be repaired, or does it need replacement?
Many cracks can be repaired if the damaged laminate can be removed or reinforced and the splitter can retain secure mounting. A clear-coat scratch with sound material beneath differs from a split through the weave or a damaged support. The decision should account for the part’s function, not appearance alone. If the repair can’t restore reliable attachment and shape, replacement is more appropriate.
How do repair costs compare with replacement costs for carbon fiber splitters?
Repair may be the more economical route when damage is contained and the splitter’s mounts and overall shape remain usable. Replacement may make better financial sense if extensive reinforcement and refinishing approach the cost of a suitable new part. Compare like-for-like quotes: include the replacement component, fitment, and finish, and compare them with the complete structural repair, not just a cosmetic patch.