
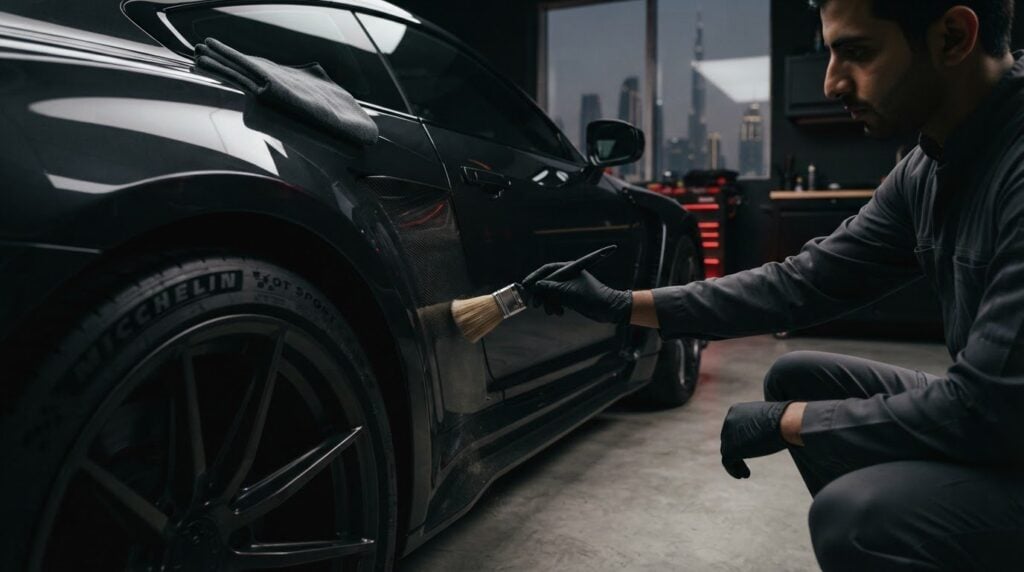
A widebody kit needs a controlled clean, not a forceful blast aimed into its seams. To learn how to clean under a widebody kit, first remove loose dirt with a soft brush, then use a damp microfiber cloth to reach only the areas you can access without forcing tools into tight gaps. Dry the area gently and stop if a panel moves or you notice damage.
It’s natural to want every edge spotless, especially on a carefully finished build. But aggressive scrubbing, high-pressure water, or tools wedged into narrow gaps can damage the finish or the kit.
This guide walks you through a safe cleaning sequence, explains what to avoid, and shows when limited access or visible damage calls for professional attention. It also covers factors that can affect cleaning or repair costs, ways to limit grime buildup, and how regular care helps preserve the kit’s appearance.
Key Takeaways
- Use gentle, controlled cleaning beneath accessible flare edges; avoid forcing tools into narrow gaps or directing strong water pressure at seams.
- Choose soft brushes and microfiber cloths to lift grime while reducing the risk of scratching nearby finishes.
- Look for trapped moisture, persistent dirt, loose edges, or corrosion that may signal a problem beneath the kit.
- Keep a consistent maintenance routine and dry cleaned areas carefully to help limit grime and moisture buildup.
- When paint protection is part of your care plan, Vanguard Motors Dubai offers Paint Protection Film (PPF) Installation.
Maintenance and durability
Durability depends on keeping the flare edges clean without disturbing their fit or finish. Follow a repeatable inspection and drying routine, especially after dusty UAE drives or washing.
-
Choose Safe Cleaning Tools and Products
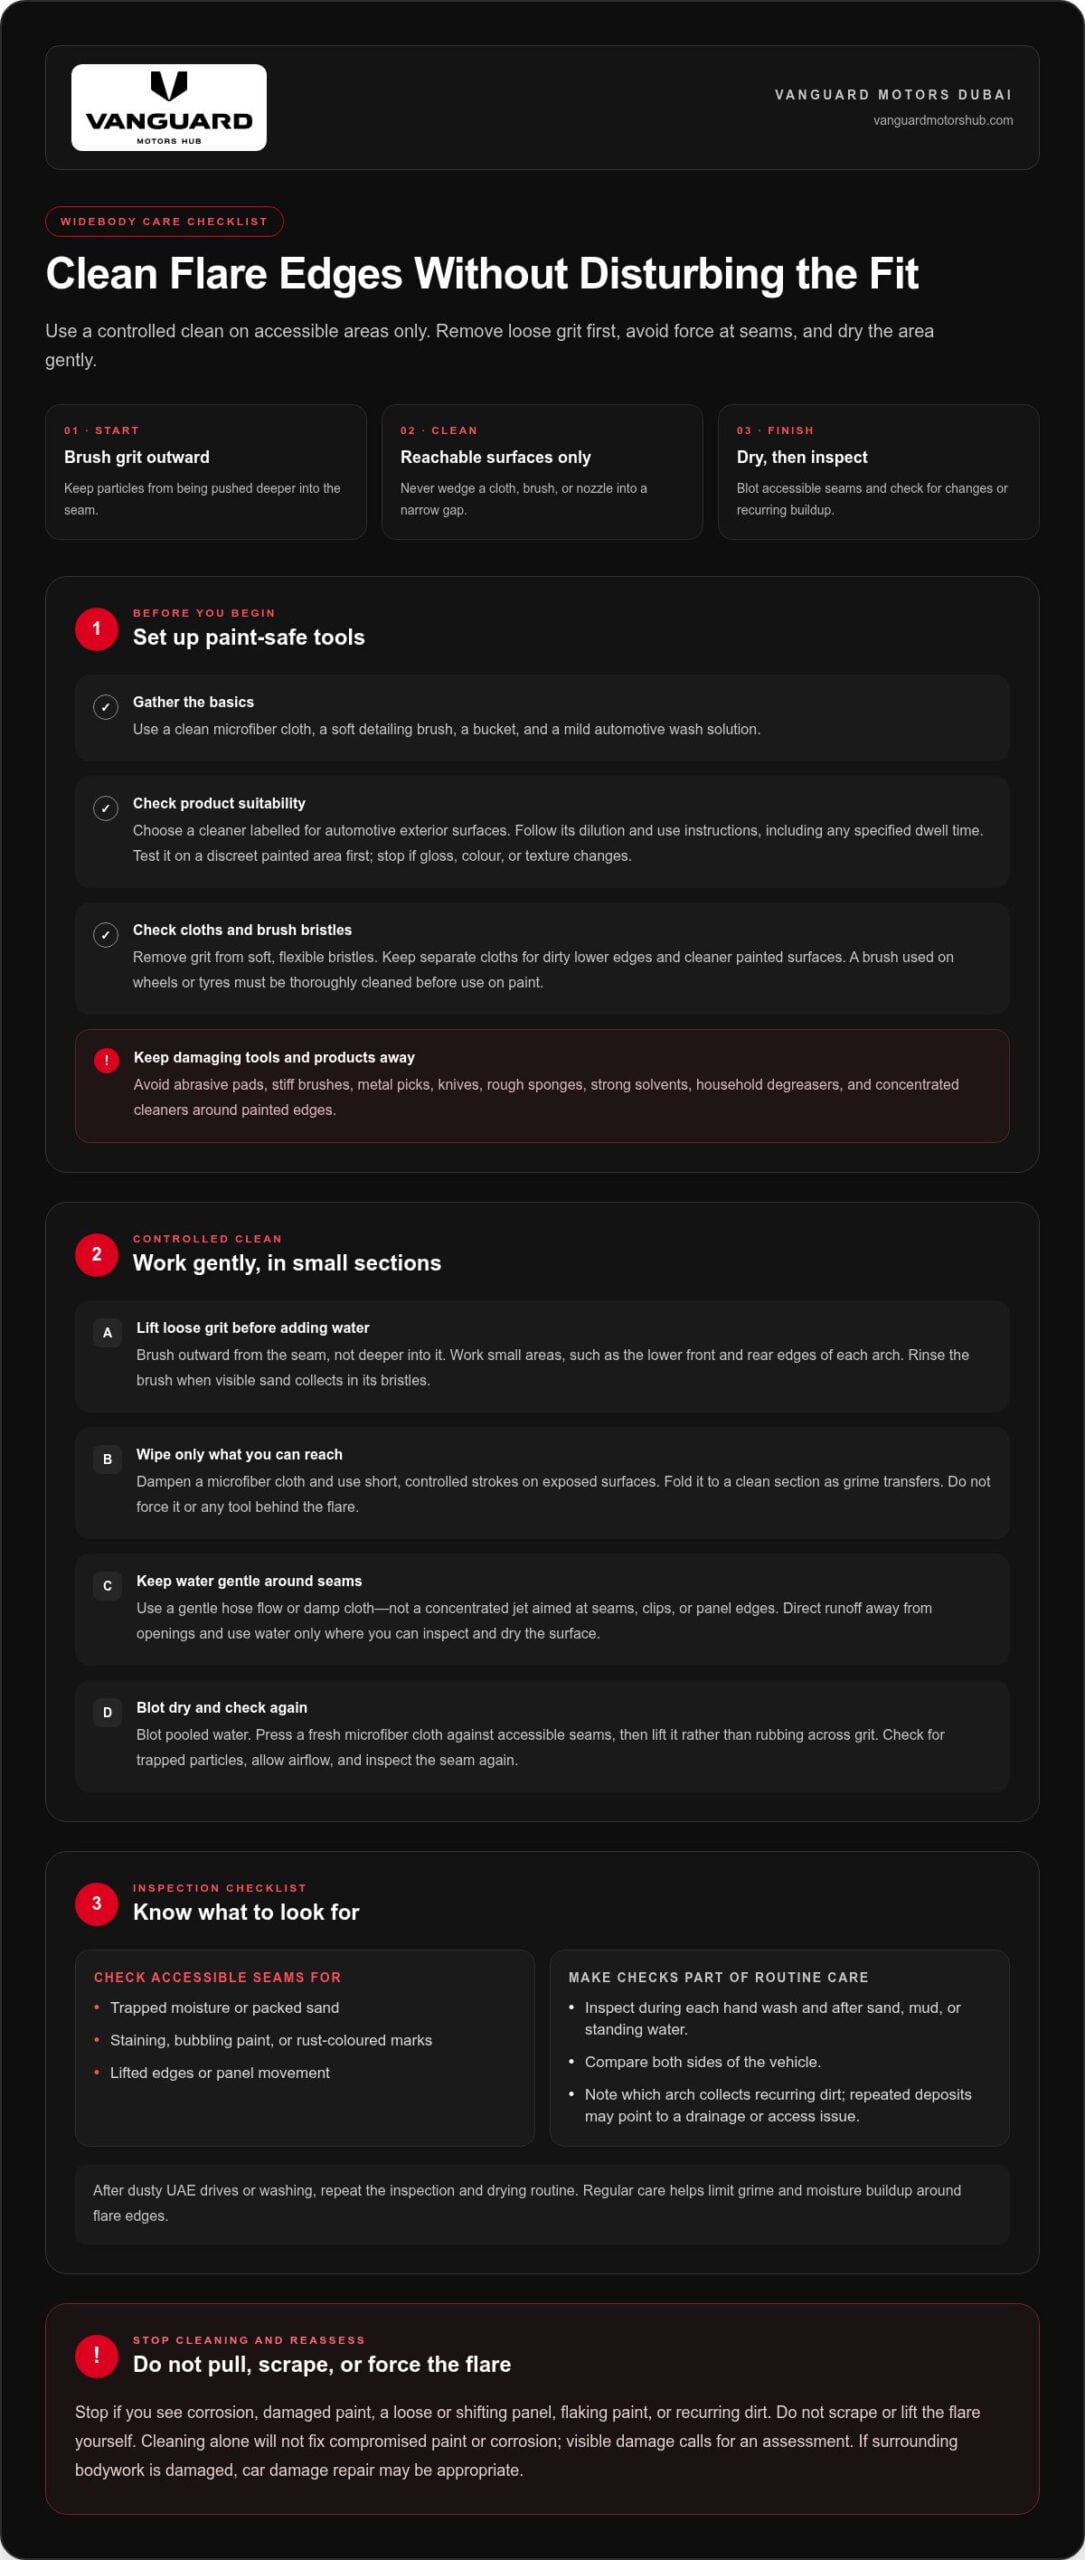
Use a clean microfiber cloth, a soft detailing brush, and water with a mild automotive cleaner. Check the product label to confirm it’s suitable for paint and exterior surfaces before using it near a flare. Keep abrasive pads, stiff brushes, metal picks, and strong solvents away from painted edges. A soft brush loosens dry grit, while a damp cloth lifts residue without scraping the finish.
-
Inspect for Water, Dirt, and Corrosion Damage
Use a light to inspect each accessible seam. Look for trapped moisture, packed sand, staining, bubbling paint, or rust-coloured marks. Compare both sides of the vehicle, as recurring dirt can show where debris collects. Check for lifted edges or movement without pulling the flare. Stop if you see corrosion, damaged paint, or a loose panel.
- Remove loose grit before adding water. Brush outward from the seam, not deeper into it, so particles don’t get trapped between the flare and body. Work in small sections, such as the lower front and rear edges of each arch. Rinse the brush when visible sand collects in its bristles. A gritty brush can drag particles across the paint and leave fine scratches.
- Clean only the areas you can reach without forcing a tool behind the flare. Dampen a microfiber cloth and use short, controlled strokes on accessible surfaces. Fold the cloth to expose a clean section as grime transfers. Don’t wedge a cloth, brush, or nozzle into a narrow gap. Pressure on the edge can disturb the finish or strain the kit’s attachment points.
- Control water around seams while washing. Use a gentle flow instead of aiming a concentrated jet at the flare’s edge. Direct runoff away from openings, then check whether water drains freely from the accessible area. Blot any pooled water with a clean cloth. Repeated moisture around a seam deserves attention, especially if the paint changes texture or colour.
- Dry the cleaned area before finishing the wash. Press a fresh microfiber cloth against accessible seams, then lift it rather than rubbing across grit. Check the cloth for trapped particles before reusing it. Let airflow reach the cleaned area, then inspect the seam again. Drying helps prevent damp residue from mixing with dust and collecting along the flare.
- Make inspection part of your usual vehicle-care routine. Check the arches during each hand wash and after driving through sand, mud, or standing water. Note recurring buildup in a simple vehicle-care record, including which wheel arch collects it. Repeated deposits in one spot may point to a drainage or access issue that needs closer attention.
- Respond to changes early to protect the kit. If an edge shifts, paint flakes, rust-coloured staining appears, or dirt returns quickly, don’t scrape or lift the flare yourself. Keep the exterior clean and arrange an assessment for visible damage. If the surrounding bodywork is damaged, car damage repair may be appropriate. Cleaning alone won’t fix compromised paint or corrosion.
What tools and products are safe for cleaning under widebody fender flares?
- Gather a clean microfiber cloth, a soft detailing brush, a bucket, and a mild automotive wash solution. These tools lift accessible grime without scraping the flare or nearby paint. Keep separate cloths for dirty lower edges and cleaner painted surfaces. Remove rings or accessories that could catch on the bodywork before you start. Lay out your tools first so you won’t reach for an abrasive substitute mid-clean.
- Choose a cleaner labelled for automotive exterior surfaces and follow its dilution and use instructions. A mild car-wash solution is generally more controlled than household degreasers, concentrated cleaners, or solvent-based products, which can affect finishes, trim, or coatings. Don’t apply a product if its label excludes the surface you’re cleaning. If the label specifies a dwell time, don’t leave the cleaner on longer than directed.
- Inspect each brush before using it on the vehicle. Choose soft, flexible bristles that bend rather than scrape, and remove any grit embedded in the brush head. A detailing brush made for delicate exterior trim can reach exposed contours without the pressure of a stiff scrub brush. Don’t use a brush previously used on wheels or tyres unless it’s been thoroughly cleaned. Brake dust and sand can scratch paint.
- Use microfiber on reachable surfaces, not as a wedge behind the flare. Fold the cloth into clean sections, then wipe exposed edges with light pressure. A narrow microfiber detailing mitt may help around an accessible lip, but don’t force it into a gap. If the cloth catches, stop and withdraw it. Pulling against the edge can snag material or strain the flare’s attachment.
- Control water with a gentle hose flow or a damp cloth. Don’t direct a pressure-washer nozzle at seams, clips, or panel edges. Concentrated water can drive grit deeper into a gap or reach areas that are hard to dry. If you use a spray bottle, mist the cloth rather than flooding the arch. Use water only on surfaces you can inspect and dry.
- Test a new cleaner on a discreet, accessible painted area before using it around the arch. Apply a small amount as directed, wipe it away, and inspect the finish in good light. Look for changes in gloss, colour, or texture. Don’t continue if the test area looks different. This simple test can reveal product incompatibility before it affects a more visible part of the vehicle.
- Set aside tools that could damage the paint or kit. Avoid metal picks, knives, abrasive pads, stiff household brushes, and rough sponges. Don’t scrape packed dirt from a seam with a screwdriver or plastic trim tool. Never mix cleaning chemicals or transfer a product into an unlabelled container. If residue won’t lift with a soft brush and suitable cleaner, stop rather than applying more pressure.
- Finish with a separate, clean microfiber towel and dry the surfaces you reached. Check the towel for grit before wiping, and rinse or replace it if particles remain. Wash used cloths separately from heavily soiled wheel-care materials, and remove trapped debris before reuse. Store brushes dry and protected from dust. Clean tools help prevent old sand or residue from scratching the flare during the next wash.
What warning signs indicate water, dirt, or corrosion damage beneath a widebody kit?
Inspect each accessible wheel arch in good light after washing. Compare both sides and record any changes that return or worsen.
- Look for moisture that remains along an accessible seam after nearby surfaces dry. Check the lower edge, arch corners, and places where water could collect. A damp patch that returns after cleaning deserves attention. Don’t push cloths or tools behind the flare to investigate. This can disturb the edge without revealing the full hidden area.
- Check the front and rear ends of each flare for packed dirt. Sand, mud, or dark residue that repeatedly collects in one spot may indicate a debris trap. Note its location and compare it with the opposite arch. Don’t dig out compacted material with a pick or screwdriver, as scraping can mark the paint or damage the seam.
- Inspect visible paint near the kit for bubbling, flaking, or changes in texture. These signs can indicate that the surface has been affected beneath or beside the flare. Look from different angles in daylight, as a raised edge may be easier to spot than a colour change. Don’t press, peel, or scrape the paint to test it.
- Look for orange or brown marks around exposed metal, seams, and fasteners. Rust-coloured staining can signal corrosion, particularly if it returns after you wipe the surface clean. Check whether the mark sits on top of dirt or appears to come from the underlying edge. Don’t cover it with polish or paint, as that hides a useful warning sign.
- Compare the flare’s alignment on both sides. A visible gap, lifted corner, or uneven edge can allow debris to collect differently. Stand back and view each wheel arch from the same angle, then inspect the affected area closely. Don’t push or pull the panel to test its attachment. Movement or a new gap needs closer assessment.
- Notice whether a musty smell or damp residue remains near an arch after cleaning. These clues don’t identify the cause, but they can help pinpoint an area for inspection. Check the adjacent bodywork and lower arch, then note where the smell or residue is strongest. Don’t mask it with fragrance or apply more cleaner before locating the visible source.
- Track recurring signs in a simple vehicle-care note. Record the wheel arch, the visible symptom, and whether it returned after cleaning. For example, write “rear left, dark grit at lower edge” rather than “needs attention.” A clear record can reveal patterns across washes and help you describe the issue accurately during an assessment.
- Stop cleaning if you find loose trim, flaking paint, corrosion, or moisture that remains trapped. Don’t lift the flare or spray forcefully into the gap to expose more. Keep the area accessible and avoid abrasive treatment until the affected bodywork has been assessed. Cleaning can remove surface residue, but it can’t restore damaged paint or correct corrosion beneath a panel.
- Arrange an assessment if staining, paint changes, or a loose edge persists. Share the recorded location and describe when you noticed the sign. For visible bodywork concerns beneath a widebody kit, discuss the damage and next steps. Clear observations help focus attention on the affected area.
Vanguard Motors Dubai: Paint Protection Film (PPF) Installation
Vanguard Motors Dubai installs Paint Protection Film (PPF) for owners seeking an added protective layer on painted bodywork. Consider it after cleaning and inspecting the widebody area if you want to help shield accessible paint from everyday surface wear. PPF doesn’t replace careful washing or resolve trapped moisture, corrosion, loose trim, or existing paint damage. Address visible issues before planning film installation so the underlying surface is ready for protection.
If you’re considering PPF for your vehicle, contact Vanguard Motors Dubai to discuss the next step.
Keep Your Widebody Finish Ready for the Road
Make care part of your ownership routine rather than waiting for visible damage. A brief note after each inspection can help you spot recurring buildup, changes around the flare, and areas needing attention. It also gives you a clearer starting point when planning future protection or bodywork.
Knowing how to clean under a widebody kit helps preserve its appearance, but cleaning has limits. If the finish needs added protection or a visual update, Vanguard Motors Dubai offers Paint Protection Film (PPF) Installation, Colored Sticker Wraps, and Peelable Paint Applications. Choose the next step based on your vehicle’s condition and the look you want.
For advice on a suitable next step, contact Vanguard Motors Dubai. Keep your maintenance deliberate, and your widebody build ready to make its mark.
Frequently Asked Questions
How to clean under a widebody kit without removing it?
Clean only exposed areas you can reach without pushing tools behind the flare. Use a work light to see where the body panel ends and the kit begins, then wipe accessible surfaces without levering against the edge. The safest way to clean under a widebody kit is to stop wherever the gap hides the surface. A hidden area needs inspection, not blind scraping.
How to remove dirt and debris trapped between a widebody kit and the body?
Don’t pull compacted debris out with a pick, screwdriver, or improvised hook. These tools can scratch paint or catch an edge. Remove what you can reach from the outside, then assess whether the gap remains packed or dirt quickly returns. Persistent grit at one corner, for example, may mean the area needs closer access. Don’t blast debris deeper with compressed air or a concentrated water jet.
How to clean and dry the wheel wells and inner fenders on a widebody car?
Start with a cool vehicle and clean visible wheel-well surfaces in sections. Keep water away from exposed electrical connectors and sensitive components. Use an automotive cleaner compatible with the surface and follow its label. After rinsing, check liner edges and accessible seams for retained moisture. Dry reachable areas and let airflow finish the job before parking in a closed, damp space.
Can pressure washers damage widebody kit panels, adhesives, or fasteners?
Yes. A concentrated jet aimed at a panel edge can force water and grit into a seam, stress an attachment point, or lift an already weakened edge. The risk depends on the nozzle, pressure, angle, and distance. Don’t direct the spray at joins, exposed fasteners, or loose trim. A gentle hose flow gives you better control around arch edges and makes movement easier to spot.
How to prevent rust and corrosion under a widebody kit after cleaning?
Limit the time moisture and debris remain against bodywork by removing accessible residue, drying reachable areas, and keeping drainage paths clear. Don’t apply paint, sealant, or rust treatment over wet or dirty surfaces, as this can conceal a developing problem. If you spot rust-coloured staining or damaged paint, arrange an assessment rather than covering it. A coating can’t repair corrosion that has already formed.
When should a widebody kit be removed for a thorough cleaning and inspection?
Consider removal when dirt remains trapped beyond reach, moisture repeatedly appears at the same seam, corrosion is visible, or the kit has shifted. These signs call for access to the bodywork behind the flare. Avoid removing the kit yourself if you’re unsure how its fasteners or bonding are arranged. Releasing it incorrectly can damage paint, clips, or the panel edge.
How often should you clean under a widebody kit in the UAE’s dusty and sandy conditions?
Set your cleaning rhythm according to driving conditions and visible buildup, rather than following a fixed interval. Check the arches during routine washing and after driving through sandy areas or heavy dust. If grit builds up quickly, clean accessible surfaces sooner. After mostly paved driving, let visible residue guide you. Recurring buildup in one spot matters more than a calendar reminder.