
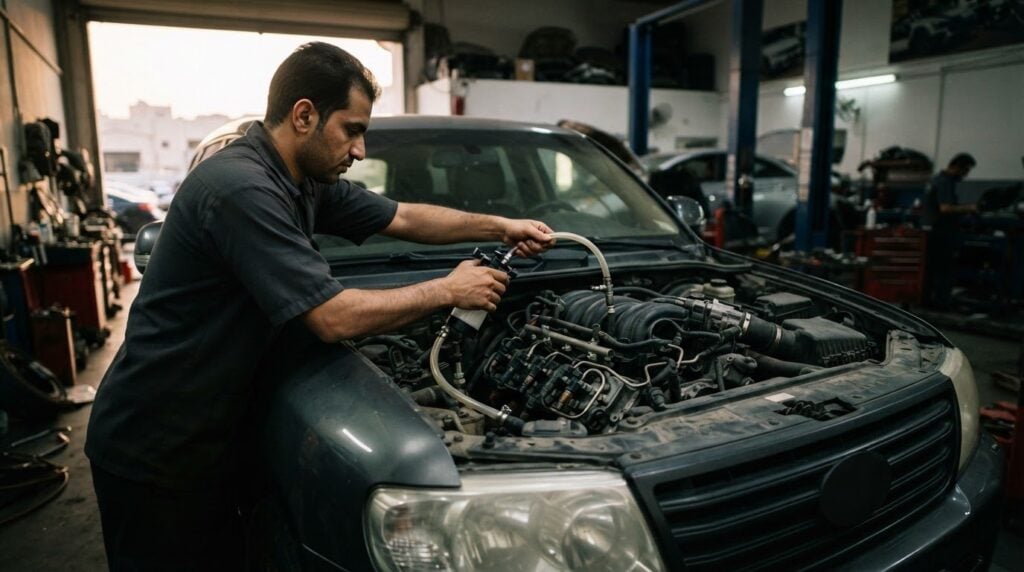
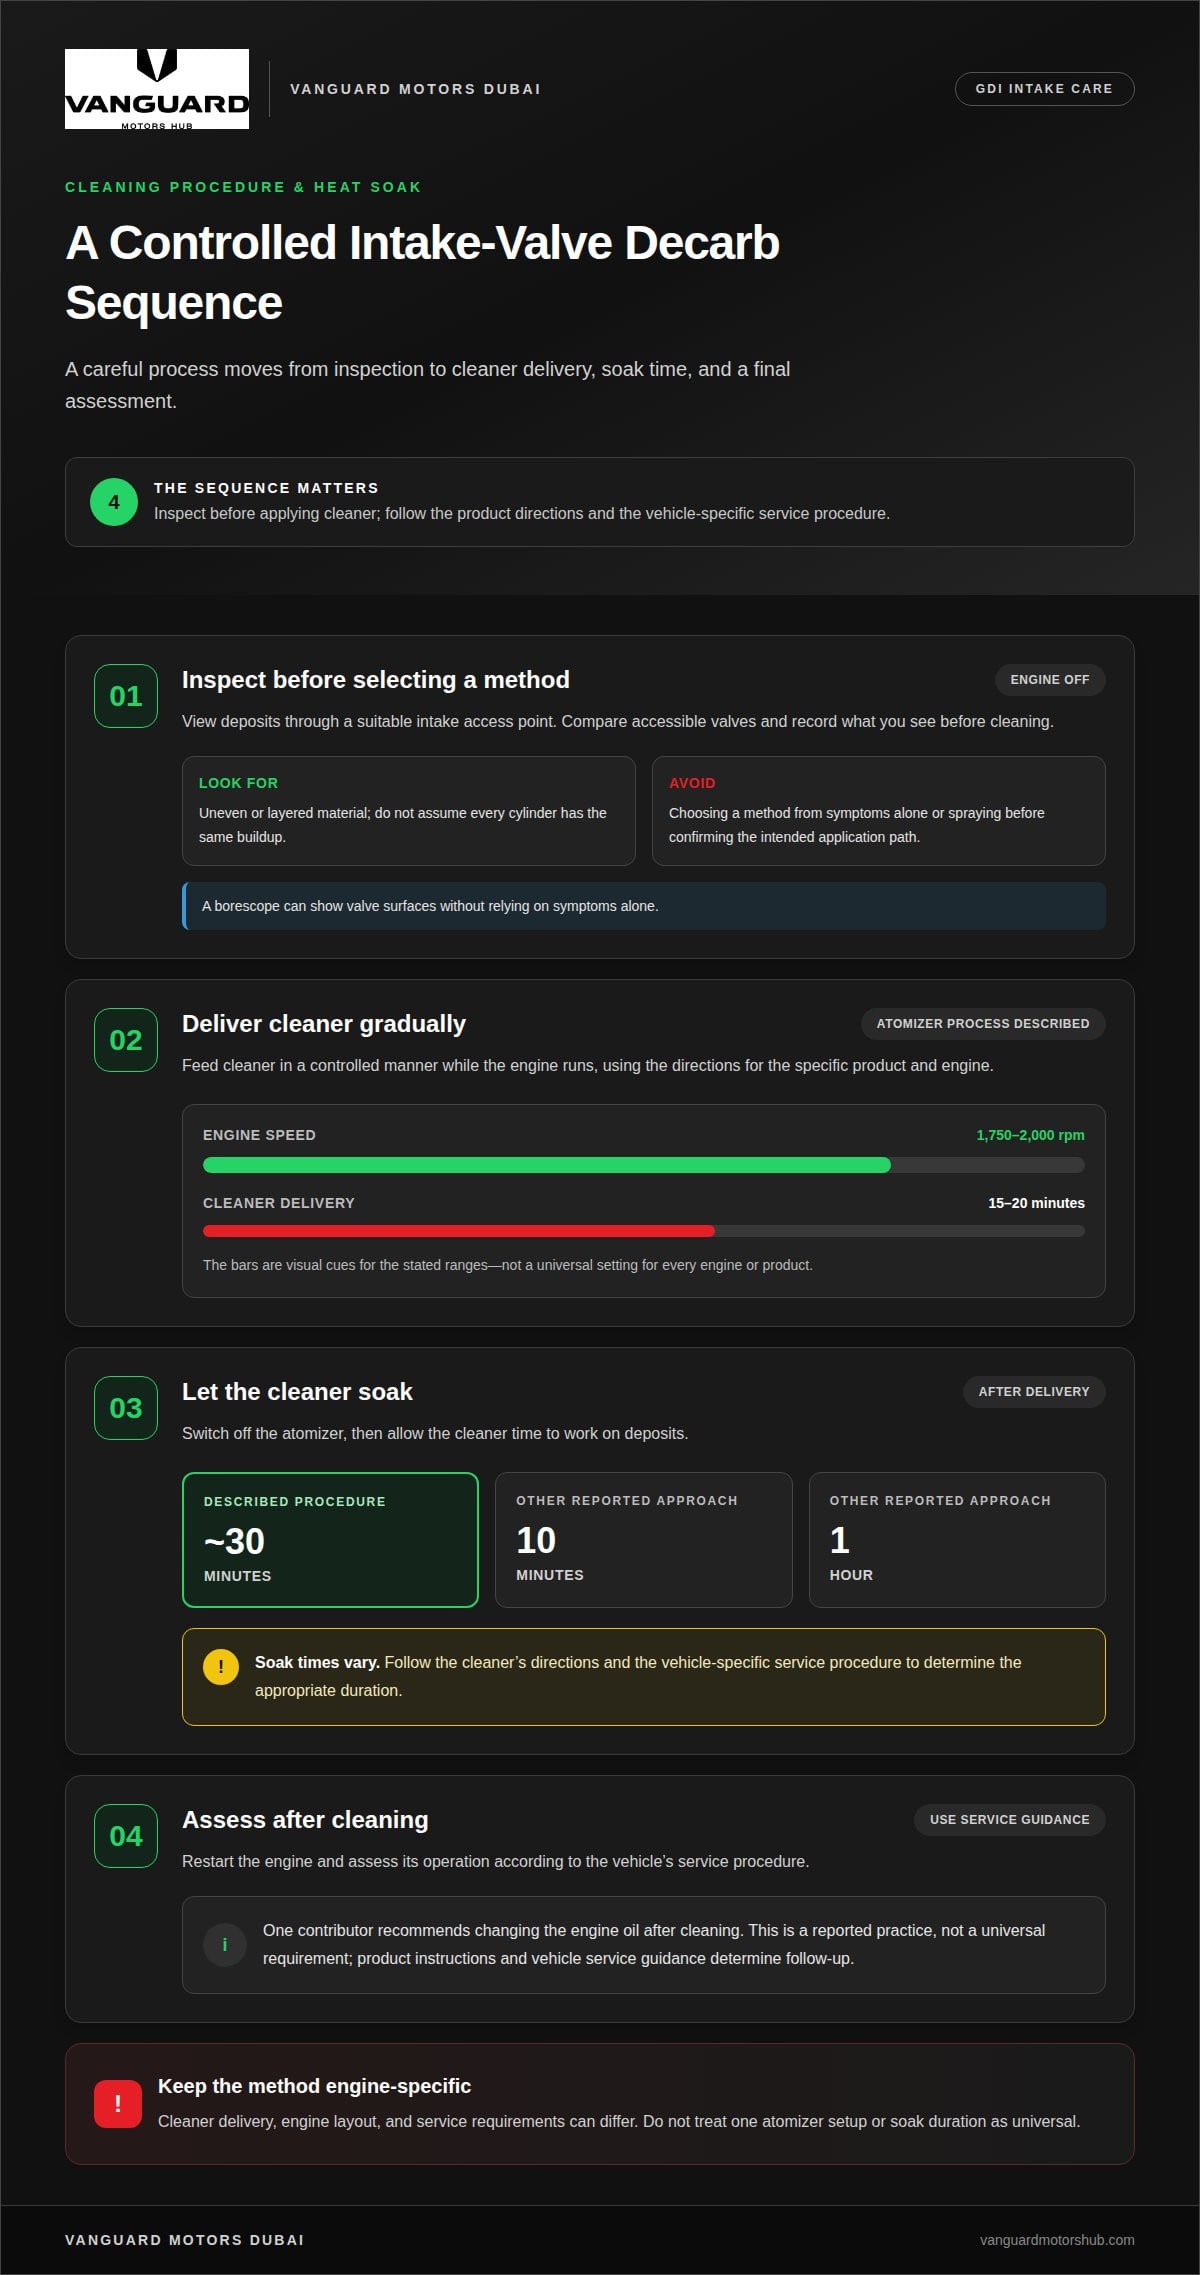
Heat soak is part of direct injection intake valve decarb, not an optional pause. In a common atomizer procedure, the engine is held at 1750-2k rpm while cleaner is fed in over 15-20 minutes, then left to soak for about 30 minutes after the atomizer is turned off. That pause gives the cleaner time to work on deposits.
Carbon buildup can be frustrating. In a GDI engine, fuel is injected directly into the combustion chamber, so it does not wash over the intake valves as it does in some other engine designs. This guide explains how deposits form, how atomizer-based cleaning works, and why engine temperature and soak time matter. You’ll also learn which symptoms may point to buildup and when professional engine carbon cleaning may be appropriate.
Key Takeaways
- Understand why GDI design can leave intake valves exposed to deposits and what driving habits may influence buildup.
- Recognize possible warning signs, while treating symptoms as clues rather than proof of carbon deposits.
- Learn how engine heat soak fits into a careful cleaning sequence and why timing matters.
- See how visual inspection can help assess deposits and guide the next step.
- Discover when professional evaluation and cleaning may be more appropriate than relying on symptoms alone.
Cleaning procedure and engine heat soak
A controlled direct injection intake valve decarb procedure depends on careful cleaner delivery and an appropriate soak. Follow the cleaner’s instructions and the vehicle-specific service procedure for the engine.
- Inspect before selecting a method. Use a suitable view through the intake path to assess visible deposits. Compare accessible valves rather than assuming every cylinder has the same buildup. Record the findings before cleaning. Symptoms alone cannot establish how much deposit is present, and spraying before assessing the intake may send cleaner somewhere unintended.
- Follow the product’s application directions. In the described atomizer process, cleaner is fed gradually while the engine runs at 1,750-2,000 rpm. The reported procedure takes 15-20 minutes to use the fluid. Keep delivery controlled and use the instructions for the specific cleaner and engine, rather than treating one setup as universal.
- Allow the cleaner to soak after delivery. After switching off the atomizer, let the engine soak for about 30 minutes. Other reported approaches describe a soak of an hour or 10 minutes. These differences make the product directions and vehicle procedure essential to choosing the right duration for a direct injection intake valve decarb process.
- Assess the engine after cleaning. Restart it and assess operation according to the vehicle’s service procedure. One contributor recommends changing the engine oil after cleaning. Treat this as a reported practice, not a universal requirement. The cleaner’s instructions and vehicle service guidance determine the appropriate follow-up.
Inspect Valves for Carbon Deposits
Start with a visual inspection through a suitable intake access point, then record deposit coverage before cleaning. Check each visible valve for uneven or layered material rather than assuming all cylinders match. A borescope can show valve surfaces without relying on symptoms alone. Keep the engine off during inspection, and do not spray cleaner until you have confirmed the intended application path.
Compare Intake Cleaning Methods
Choose between chemical intake cleaning and walnut blasting based on deposit condition and the engine’s service procedure. Chemical cleaning introduces a suitable product through the intake; walnut blasting mechanically removes deposits with the intake open and the valves correctly positioned. Either method can cause damage if performed incorrectly, including through poor setup or material entering an unintended area. The direct injection intake valve decarb method must suit the specific engine.
Set Cleaning Frequency and Prevention Expectations
Base cleaning frequency on inspection, driving pattern, and fuel habits, not a fixed schedule. Some contributors begin recommending cleaning around 50,000-60,000 miles; frequent short trips and non-top-tier fuel are cited as reasons to consider it sooner. Longer drives and top-tier detergent fuel may support waiting. Additives or premium petrol can’t be assumed to prevent deposits because injected fuel doesn’t wash over the intake valves.
Vehicles equipped with GDI engines
- Confirm the engine uses gasoline direct injection. Check the vehicle handbook, engine specifications, or service information for “GDI,” “direct injection,” or a similar description. Model badges alone may not identify the fuel system, since one model can have different engines. Record the engine code when available. This helps match inspection and cleaning procedures to the correct configuration.
- Identify whether the engine uses direct injection alone. Some engines combine direct injection with port injection, changing how fuel reaches the intake path. Use the manufacturer’s engine description rather than assuming every petrol engine in a model range has the same layout. Confirming the system first helps avoid using a cleaning approach designed for a different intake arrangement.
- Use vehicle-specific service information before planning work. Intake access, component layout, and valve positioning vary between engines. Follow the procedure for the exact engine code, especially if intake components must be removed for inspection or cleaning. Do not automatically transfer a procedure for one GDI engine to another vehicle, even if both have the same manufacturer badge.
- Interpret test results in their proper context. CRC reports that intake-valve deposit weight on a 2009 Cadillac CTS decreased from 604.2 mg to 457.2 mg after its tested cleaning process. That example documents a change in one test; it doesn’t establish the same result for every GDI engine. Engine design, deposit condition, and cleaning method affect the outcome.
- Separate intake-valve deposits from other engine concerns. A GDI label identifies the fuel-delivery design, not the cause of every running issue. Misfires, uneven idle, and reduced response can have several possible causes. Use diagnostic findings and valve inspection together before choosing a cleaning method. If the evidence points to another fault, address that rather than treating carbon removal as a universal fix.
- Keep the engine’s intended use in view. A daily-driven sedan, a performance vehicle, and a vehicle used mainly for short trips can have different operating patterns. Record driving conditions and service history alongside inspection findings. This context helps determine whether deposits need attention now or whether another diagnostic step should come first.
- Discuss the findings before committing to a procedure. A clear explanation should connect the engine type, inspection evidence, and proposed method. For a UAE vehicle with uncertain symptoms or intake concerns, share the engine details and inspection findings to discuss an appropriate next step with Vanguard Motors Dubai.
The chosen cleaning method should always match the specific condition of the intake tract and the procedure selected for that particular engine. A customer testimonial describes a 1995 Jeep with close to 300,000 miles and its original engine without a rebuild, though it remains just one account regarding overall engine longevity.
Why GDI intake valves accumulate carbon deposits
- Trace the fuel path in the engine design. In a gasoline direct-injection engine, injectors spray fuel into the combustion chamber, not across the back of each intake valve. Port-injected fuel can wash that surface; direct injection does not provide the same cleaning action. This difference explains why GDI valves can collect deposits even when the fuel system is operating normally.
- Account for oil vapour entering the intake. The crankcase ventilation system routes blow-by gases back into the intake, and those gases can carry oil mist. As air passes through the intake ports, the mist may settle on the valve backs. Over repeated engine cycles, residue can combine with other material and form deposits. The amount depends on engine design and operating conditions.
- Consider exhaust-gas recirculation where fitted. Some GDI engines route part of the exhaust gas back into the intake to support emissions control. Exhaust particles can contribute to intake residue, particularly when they meet oil vapour on a valve surface. This varies between engines: routing and control strategies differ, so the vehicle’s specific design matters.
- Connect residue with operating heat. Intake valves undergo repeated heating and cooling as the engine runs and stops. Oil mist and other residue exposed to these cycles can harden, making deposits more persistent than fresh film. For example, a thin coating may gradually become a rough layer that changes the surface around the valve stem and airflow path.
- Separate deposit formation from engine failure. Carbon on a valve does not by itself prove there is a fault. Deposits may build gradually while the engine continues to run, and their effect depends on location and coverage. Use inspection evidence alongside diagnostic findings. A GDI badge alone cannot establish deposit severity or explain every change in engine performance.
- Use the mechanism to guide prevention decisions. Because directly injected fuel does not pass over the intake valves, changing petrol grade cannot recreate the wash across that surface provided by port injection. Fuel quality still matters to combustion and injector operation, but valve deposits also involve the intake path and crankcase vapours. Keep these systems distinct when assessing maintenance needs.
Evidence from cleaning reports should be read according to the surface measured. CRC reports that a 2009 Cadillac CTS’s piston-top carbon deposit thickness decreased from 8.59 mils to 2.77 mils. That is a reported change on the piston top; it does not, by itself, establish the amount of buildup on that engine’s intake valves or show that all GDI designs respond similarly. Keep the distinction between combustion-chamber deposits and deposits on the valve backs clear when considering inspection findings.
A contributor recommends letting the cleaner sit for about an hour to help break down carbon. This describes a suggested dwell time, not a guaranteed result or a measure of valve cleanliness. Interpret cleaning methods and reported outcomes in relation to the component treated and the evidence available for the vehicle. A reduction in carbon on a piston top can provide useful context, but it cannot replace direct assessment of intake-valve deposits or diagnostics when symptoms are present. This prevents a cleaning anecdote from being mistaken for proof of the cause or extent of a GDI intake problem.
What symptoms indicate intake valve carbon buildup?
Notice changes such as rough idle, hesitation, or misfires, and record when they occur. These symptoms can have other causes, so treat them as diagnostic clues, not proof of deposits.
- Track rough idle at a standstill. Note whether the engine shakes while idling in Park or at traffic lights. Record whether the tachometer fluctuates or the vibration changes after warm-up. Restricted airflow may contribute to rough idle, but ignition faults and air leaks can cause similar behaviour.
- Record cold-start behaviour. Note whether the engine stumbles, runs unevenly, or misfires after being parked overnight. Compare that start with a restart after driving. A repeatable cold-start pattern gives a technician useful context, but does not identify intake deposits on its own.
- Pay attention to acceleration response. Note hesitation when pulling away, joining a road, or climbing a hill. Record the engine speed and driving conditions when the delay occurs. Deposits restricting airflow may affect response, while fuel-delivery or ignition problems can cause similar hesitation.
- Observe misfires and warning lights. If the engine warning light appears, record when it comes on and whether the engine also runs unevenly. Diagnostic trouble codes can help locate a misfire, but a code alone does not confirm carbon on an intake valve. Keep the scan results for diagnosis.
- Compare symptoms across operating conditions. Note whether rough running occurs at idle, during light acceleration, or while driving steadily. For example, a vehicle that idles unevenly but accelerates smoothly presents a different pattern from one that hesitates under load. This comparison helps narrow the diagnostic direction without assuming a single cause.
- Watch for changes in engine performance. Record whether the vehicle feels less responsive than before under familiar driving conditions. Do not treat a subjective change in power as a measurement. Compare it with repeatable observations, such as hesitation on the same incline or roughness at the same stop.
- Keep fuel-use observations in context. If consumption seems to change, compare similar journeys and driving conditions before drawing conclusions. Traffic, air-conditioning use, tyre condition, and route can all affect fuel use. A change alongside rough idle or misfires calls for diagnosis, not an automatic assumption of valve buildup.
- Review recent service and repair history. Note recent spark-plug, ignition-coil, or air-intake work, and when symptoms began. A misfire after a repair may have a different explanation from a gradual change over time. This timeline helps distinguish possible causes before considering cleaning.
- Confirm deposits through inspection. Ask to see evidence from the intake valves before connecting symptoms to carbon. A borescope view can show valve surfaces, while diagnostic checks can identify other faults. If observations and inspection support buildup, cleaning can be considered as a targeted response, not a guess based on one symptom.
How can direct-injection intake valves be inspected for carbon deposits?
Use a staged inspection to distinguish visible deposits from symptoms that may have other causes.
- Confirm the engine and intake layout. Identify the vehicle’s engine code and whether it uses direct injection. Check service information for intake access and valve-positioning requirements. Engine layouts differ, so a procedure for one GDI engine may not suit another. Record the configuration before selecting inspection tools or removing components.
- Review the diagnostic history. Read stored fault codes and note misfires, rough idle, or hesitation. Treat these findings as context, not proof of carbon. For example, a misfire code can point to a cylinder but cannot show deposit coverage. Keep scan results with the inspection record.
- Prepare safe access to the intake path. Follow the vehicle-specific procedure for exposing the intake valves. Keep dirt and loose material away from open ports, and do not force connectors or components. If access requires removing intake parts, document their positions so they can be refitted correctly.
- Position the valves for a clear view. Follow the engine service procedure to position the relevant valves so their backs can be seen through the intake port. A closed valve presents a surface for inspection; an open valve can expose the cylinder. Never assume every cylinder is in the same position.
- Use a borescope to examine each accessible valve. Guide the camera through the intake opening and capture clear images of the valve backs and surrounding port. Look for uneven, rough, or layered deposits. Avoid pressing the probe against the valve or damaging nearby surfaces while imaging.
- Compare cylinders rather than relying on one view. Inspect each accessible intake valve and note differences in deposit coverage. A heavily coated valve beside a cleaner surface may warrant closer diagnosis. Record the cylinder location and image orientation so later assessments can compare the same areas accurately.
- Connect visual evidence with engine findings. Compare the images with fault codes and reported running symptoms. Deposit appearance alone does not establish how much airflow is affected. If images show substantial buildup, document the evidence before deciding whether cleaning is appropriate for that engine.
- Arrange an evidence-led inspection if access is limited. A clear assessment depends on suitable access, valve positioning, and careful imaging. Arrange an intake-valve inspection to discuss the engine details and symptoms with the team.
Vanguard Motors Dubai
Vanguard Motors Dubai can help when inspection findings leave you weighing the next step. Clear evidence matters: symptoms alone cannot confirm deposits, and visual inspection can help distinguish buildup from other engine concerns. Share the vehicle’s engine details, observed symptoms, and inspection findings to focus the discussion on your concern.
For broader vehicle care, Vanguard Motors Dubai offers Paint Protection Film (PPF) Installation, Colored Sticker Wraps, Peelable Paint Applications, and the Vanguard Premium Package. These services address vehicle protection and appearance, while intake-valve concerns require a separate maintenance decision. Contact Vanguard Motors Dubai to discuss your vehicle and its inspection findings.
Make Your Next Maintenance Decision With Confidence
A direct injection intake valve decarb decision should reflect the engine’s actual condition, not a guess based on one symptom. Keep inspection images and diagnostic findings together as a useful baseline for future maintenance. If performance changes later, that record can help distinguish a new issue from an existing pattern.
Use the next conversation to clarify the vehicle’s specific concern and what the inspection shows. Clear details make it easier to discuss an appropriate next step without treating cleaning as a universal fix. For guidance related to your vehicle, contact Vanguard Motors Dubai about your inspection findings.
With clear evidence, you can make a more informed maintenance decision and keep your focus on dependable performance.
Frequently Asked Questions
What causes carbon buildup on intake valves in direct-injection engines?
Oil vapour and combustion-related residue can accumulate on intake valves because injected fuel does not wash their backs. The rate and pattern vary with engine design, crankcase ventilation, and operating conditions. For example, two GDI vehicles can show different deposit patterns despite similar use. Deposits do not automatically indicate a failed component, so interpret them alongside inspection evidence and the engine’s diagnostic history.
What methods remove carbon from direct-injection intake valves?
Common approaches include chemical intake cleaning and walnut-shell blasting. Chemical treatment introduces a suitable cleaner through the intake; blasting mechanically removes deposits after access is opened and the valves are positioned for the work. The practical choice depends on deposit condition, engine layout, and the applicable service procedure. Select a method for the specific engine, not simply because it is familiar or convenient.
What are the steps and labor time for walnut blasting intake valves?
Walnut blasting typically involves gaining intake access, positioning each cylinder’s valves closed, protecting nearby openings, removing deposits with blasting media, and extracting residue before reassembly. The technician then checks the cleaned surfaces and refits removed components. Labour time varies with engine design, intake access, and the work required for disassembly and reassembly. A universal duration would be misleading without the vehicle and engine details.
How often should direct-injection intake valves be cleaned, and does the manufacturer recommend it?
There is no single cleaning interval that applies to every GDI vehicle. Manufacturer maintenance guidance is specific to the model and engine, so follow the applicable service schedule rather than assuming decarbonization is routinely required. Inspection findings, driving patterns, and symptoms can inform the decision. Mileage alone does not establish deposit severity, and a running issue should be diagnosed before choosing cleaning.