
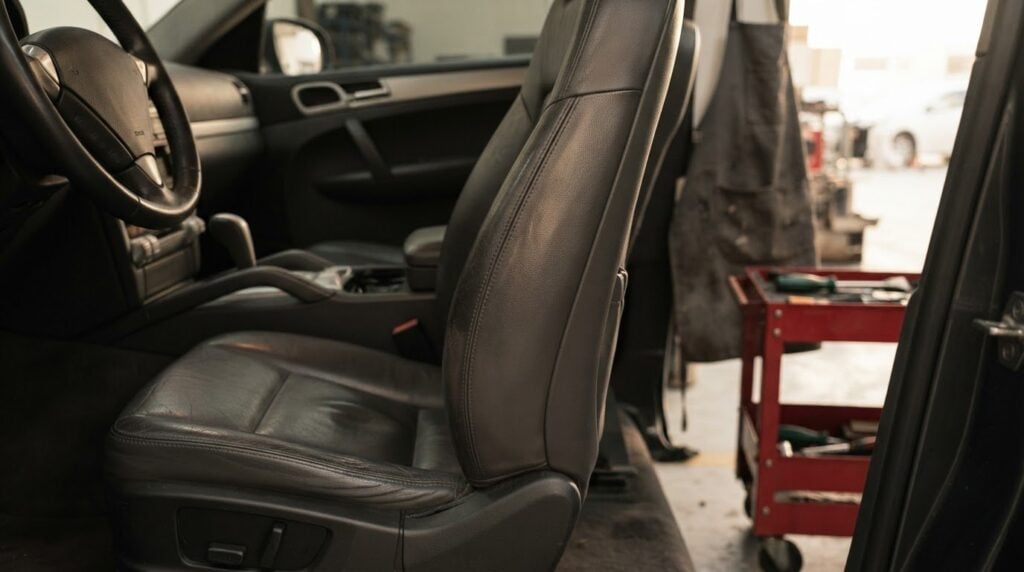
A finished bolster repair doesn’t mean the seat is ready for unrestricted use straight away. For luxury automotive leather bolster repair across the UAE, avoid heavy use for the first 24 hours while the bond matures; the repair is usually cured within 24 hours. That short pause helps protect the restored area as it settles.
It’s natural to want your car back in use quickly, especially when damage is limited to a worn or torn seat bolster. At Vanguard Motors Dubai, the right repair depends on the leather or vinyl’s condition, the damaged area’s size, and how closely the finish needs to blend with the surrounding upholstery. This guide explains what damage may be repairable, how colour matching works, what affects the process, and what to consider before using the seat normally again.
The repair process can involve surface preparation, texture matching, and time for the finish to cure. Understanding these factors helps you make a clearer decision about restoring your interior and caring for the upholstery afterward.
Key Takeaways
- Color restoration depends on matching both the upholstery shade and its surface texture, not just applying a similar dye.
- Dubai’s heat, UV exposure and sand can affect seat condition, so identifying the damage helps determine the right repair approach.
- Scuffs, cracks, tears and peeling each call for a different level of restoration; the extent of the damage guides the method.
- Localized repairs and full re-upholstery involve different processes and timelines. Learn what influences which option makes sense for your seats.
Can you match the original leather color perfectly?
Luxury seats may combine genuine leather on the main panels with colour-matched vinyl on flexible sides. A convincing repair needs to match the shade and finish, while differences in grain and lighting can affect how closely it blends.
Color Matching and Micro-Pigmentation
Micro-pigmentation restores colour by applying pigment in controlled layers to a prepared surface. The technician compares the damaged area with nearby upholstery and adjusts the pigment to account for fading and wear. Beige leather can be especially challenging to match, so tints may need to be blended. Assess the result beside the original surface, rather than relying on a colour sample alone.
Matching the Upholstery Grain
Colour is only one part of a convincing finish. A smooth patch can stand out against pebbled upholstery, even when the shade is close. Once the repair patch has cured, a flexible material with an embossed grain can be pressed onto it to reproduce the surrounding texture. Check the repaired area from different angles, because changes in light can reveal differences in grain and sheen.
Luxury seats may have genuine leather on the flat seat and back panels, with flexible, colour-matched vinyl on the sides. Identifying the material matters: the repair material and texture should suit the section being restored. A curved bolster can reflect light differently from the flatter panel beside it.
OEM Colour Matching and Hand-Tinting
OEM colour matching aims to recreate the vehicle’s original upholstery shade. A repairer can compare the damaged area with an unaffected section, then hand-tint the pigment to suit the interior’s current appearance. This matters when sunlight or use has changed the visible colour over time. A factory colour reference alone may not match aged upholstery exactly.
Beige shows how small tint changes can shift a result noticeably. Hand-tinting adjusts the colour gradually, with comparisons against adjacent seat material. The goal is a consistent transition across the repair, not a fresh-looking spot that draws attention.
Mixing and Spraying Matching Dye
After selecting the tint, the technician mixes the dye and sprays it in controlled layers to blend the repaired section with the surrounding upholstery. Each layer contributes to the final shade and finish, so coverage should be assessed as the work progresses. A topcoat completes the surface and affects its sheen.
After application, inspect the repaired bolster beside the original panel. Compare colour, grain, and sheen together: even a close shade can look different if the finish is noticeably glossier. This final check helps show whether the repair blends naturally into the seat.
What types of stains or damage can be repaired?
UAE automotive leather-restoration and upholstery specialists repair bolster wear, surface scuffs, cracks, small tears, peeling, stains, and damaged seams. The repair method depends on the material, damage depth, and condition of the surrounding surface.
Common Automotive Leather Damage
Check the bolster for fading, scratches, cracks, peeling finish, tears, stains, and loose or damaged seams. Scuffs and colour loss affect the surface finish, while a tear may expose backing beneath the upholstery. Leather and vinyl can appear on the same seat, so identify the damaged material before deciding on a repair approach.
Repaired automotive leather may last for years with proper care and occasional conditioning. Expected durability is different from warranty coverage: the written terms for the specific repair define what is covered.
Heat, UV, and Sand Damage
Dubai’s summer heat can be intense, and parked vehicles can become very hot. The UAE UV Index is 11 year-round. Heat and UV exposure can fade upholstery and contribute to a dry, cracked surface; sand can abrade leather seats as passengers slide across gritty bolsters.
For a practical example, inspect the outer driver’s bolster for faded colour, roughness, and friction marks. These clues can help distinguish surface wear from a tear that needs filling. When cleaning, avoid rubbing grit into the upholstery, as particles can scratch the finish.
Filling and Sanding Damaged Seams
A damaged seam may leave an uneven edge or a small gap beside the stitching. A damaged seam may be treated with filler or adhesive and smoothed to blend with the surrounding stitched area. Check the seam’s contour and adjacent material: uneven filler can remain visible.
Cleaning comes before repair. Remove previously applied chemicals thoroughly, including silicone-based or petroleum treatments, because residue can interfere with adhesion. Clean leather and vinyl carefully, then let the surface dry before applying repair material or colour.
A typical repair sequence is cleaning, inspection, surface preparation, filling or patching, smoothing, colour application, and finishing. For torn vinyl, repair compound fills the gap between the edges over exposed white backing. It serves as a filler or patch, not a stitched join, so the result should be assessed with that distinction in mind.
In the UAE climate, clean leather seats weekly with a mild cleaner and condition them every 2-3 months. For damage that needs assessment, discuss your bolster repair with a clear description of the affected area.
How much time does it take to restore my car’s leather seats?
A localized repair can take 1 to 3 hours, while most car leather repairs in Dubai take 2 to 5 hours. Full car-seat re-upholstery typically takes 3 to 7 days.
The scope depends on how much upholstery needs attention, whether material must be replaced, and how much preparation the finish requires.
Localized Repair or Full Re-Upholstery
A small scuff or tear on one bolster may suit localized repair, which focuses on the damaged area. In Dubai, localized professional repairs for scuffs, small tears, or cigarette burns usually take 1 to 3 hours. Most repairs take 2 to 5 hours, depending on damage.
Full re-upholstery replaces the seat covering rather than restoring one section. It typically takes 3 to 7 days because the work involves removing and fitting upholstery. Check whether damage is isolated or spread across the seat; widespread cracking or peeling may call for broader work.
DIY or Professional Repair
A DIY kit may seem suitable for a minor mark, but matching dye, grain, and sheen takes careful preparation. Even a small colour mismatch can stand out beside an original panel. A professional repair typically involves inspecting the surface, preparing the damaged area, applying repair material, and blending the finish.
A shallow scratch may need only a localized repair. A tear that exposes backing requires a different approach, with the edges prepared before filler or pigment is applied. Choose based on the damage’s depth and visibility, not just the mark’s size. A prominent driver-side bolster needs particular care to achieve a blended finish.
Repair or Replacement
Repair can preserve original upholstery when damage is limited and the surrounding material remains sound. Replacement may be more suitable when deterioration covers a large area or the existing material cannot support a localized restoration. Compare the affected section with adjoining panels before deciding.
Time and cost depend on the scope of work. The assessment considers the extent of the damage, the number of seats, the material, and the preparation required. A single bolster and a complete seat involve different labour and upholstery needs, so they should not be treated as equivalent jobs.
Before booking, identify the damaged seat, mark each affected area, and take photographs in natural light. Include close-ups of seams, tears, and surface wear. These details make it easier to describe whether you need localized restoration or broader reupholstery, and to discuss the process and vehicle handover time.
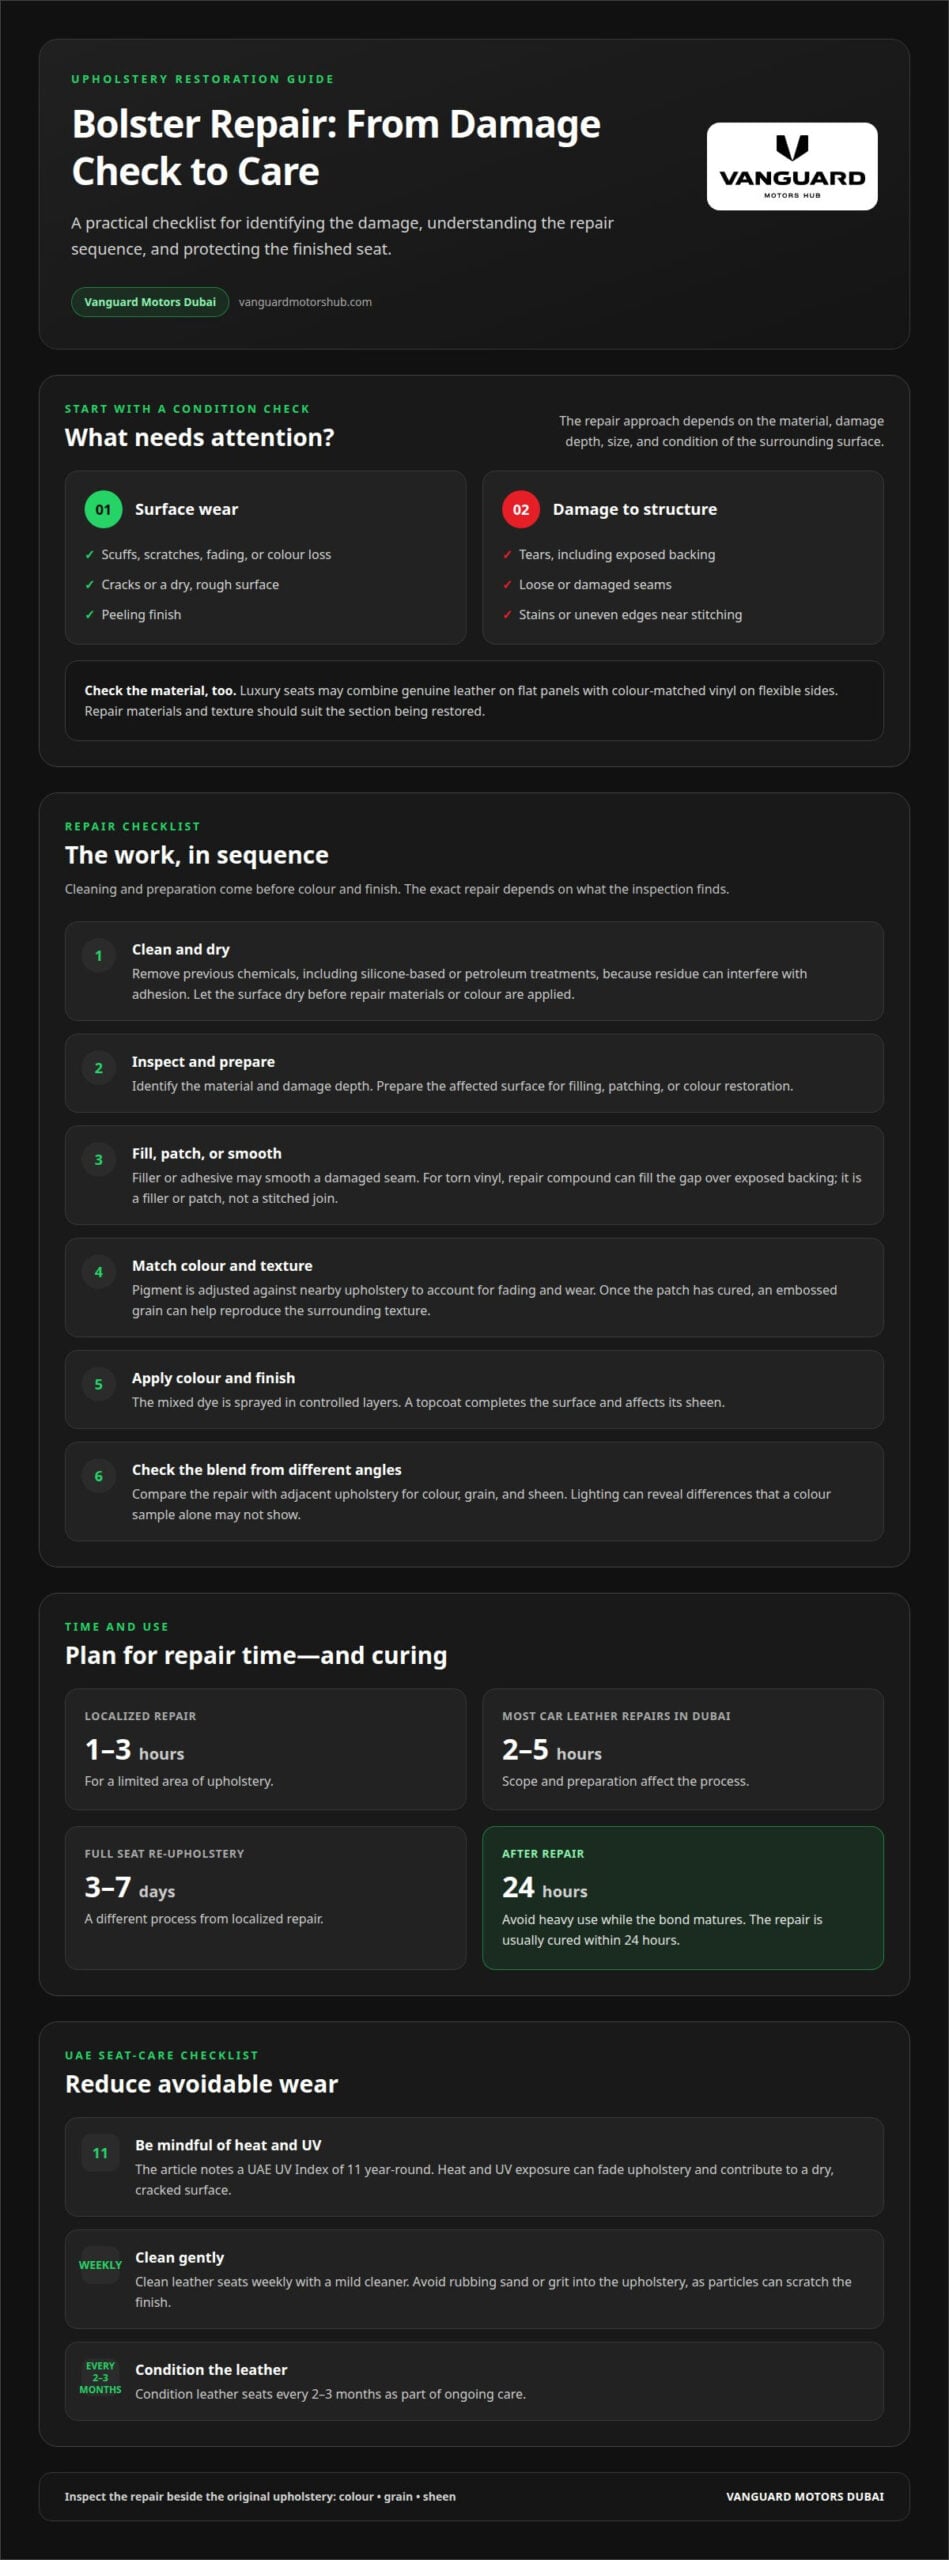
Repair duration and top-coat curing
A standard driver-side bolster repair typically takes between 2 and 3 hours. That covers the repair work, not necessarily the full curing period. The vehicle may need to remain unused afterward while the finish settles. Plan around both stages, especially if the restored seat is your usual driving position.
Top-coat curing protects the restored surface as it hardens. After car leather restoration, the recommended curing period is 24-48 hours for long-term durability. A comprehensive seat restoration may require leaving the vehicle for 24 hours so heat-resistant top-coats can cure fully. The scope of the work changes how long the vehicle stays at the workshop.
For a bolster repair, avoid heavy use for the first 24 hours while the bond matures. The repair is usually cured within 24 hours, after which it will not transfer onto clothing. These timings describe different stages: the repair’s initial curing and the longer recommended curing period for restored leather. Follow the aftercare instructions for the finish applied.
Before arranging drop-off, distinguish the repair time from the time you should wait before using the seat normally. A repair lasting two hours does not necessarily mean the seat can immediately take full pressure. If the topcoat needs more time to cure, plan another ride rather than risk friction against the fresh finish.
- Repair stage: A standard driver-side bolster repair takes between 2 and 3 hours.
- Initial use: Avoid heavy use for the first 24 hours after repair.
- Restoration cure: Allow 24-48 hours for the recommended curing period.
Keep the restored bolster clear of contact during curing. For example, avoid sliding across the repaired edge when entering or leaving the vehicle during the first 24 hours. Pressure and friction can disturb a fresh bond or finish before it has settled. Don’t apply conditioner or cleaning products during this period unless the care instructions specifically allow it.
Ask for the expected handover time and the recommended point for normal seat use as separate details. The work duration covers the repair, while curing determines when the upholstery can take regular contact. A premium interior benefits from careful application and enough time for its topcoat to cure.
Once the curing period is complete, resume ordinary use gradually and follow the supplied care guidance. Remove any temporary items or coverings only as directed, since contact with a fresh topcoat can affect its finish. For a driver’s bolster repaired in 2 to 3 hours, the first 24 hours remain the key period for avoiding heavy use.
Leather bolster scuffs, cracks, tears, and peeling
A scuff, cracked finish, and tear affect a bolster in different ways. Check whether the damage is limited to the surface or exposes the material beneath.
Scuffs and Cracks
A scuff may appear as colour loss, abrasion, or a flattened patch on the bolster. Check whether the leather surface is intact or has open cracks. Fine cracks may affect only the finish, while deeper splits can expose underlying material. That distinction helps determine whether the work focuses on colour and surface or requires filling first.
Look closely at the bolster’s raised edge, where getting in and out creates repeated friction. Compare the mark with the adjacent panel: a surface scuff may leave the structure intact, while cracks that widen with gentle movement can indicate deeper wear. Avoid pulling at cracked edges, which could enlarge the damaged area.
For a clearer assessment, photograph the area in good light and include the surrounding seat. A close-up shows crack depth and texture; a wider view shows how far wear extends across the interior. Note whether the finish feels rough, flakes away, or remains smooth. These observations help distinguish localized surface damage from broader deterioration.
Tears and Peeling
A tear creates an opening, while peeling means the surface layer is lifting or separating. Inspect the tear’s edges and check whether white backing is visible. Repair compound can fill the gap between torn vinyl edges over exposed backing. It works as a patch or filler, not as a stitched connection.
Peeling needs a separate assessment. Look for loose finish around the affected spot and check whether the underlying material remains stable. If the surrounding surface is lifting too, treating only the visible edge may leave nearby damage unaddressed. Clear photos of both the close-up and the full bolster show the extent of the area.
Use these signs to describe the damage precisely:
- Scuff: Abrasion or color change, with the surface still intact.
- Crack: A split in the finish or material; check its depth.
- Tear: An opening that may expose backing beneath the upholstery.
- Peeling: A finish layer lifting from the surface, sometimes beyond one spot.
Do not apply silicone-based or petroleum treatments before assessment; residue can interfere with repair. Thorough cleaning removes previously applied chemicals, while drying prepares the surface for restoration. For a bolster with scuffs, cracks, tears, or peeling, share photos and discuss leather restoration.
Vanguard Motors Dubai: Paint Protection Film (PPF) Installation
Vanguard Motors Dubai installs Paint Protection Film (PPF) for drivers looking to protect their vehicle’s exterior. PPF protects exterior paint, not leather bolsters, so it complements rather than replaces upholstery restoration.
For a broader visual change, Vanguard Motors Dubai offers Colored Sticker Wraps and Peelable Paint Applications as alternatives to a standard exterior finish. The Vanguard Premium Package is another option within its customization offerings. Choose according to whether your priority is paint protection or a changed exterior appearance.
If your next step is exterior paint protection or a finish change, contact Vanguard Motors Dubai to discuss the available service.
Choose the next step for your interior
Start with your seat’s condition when planning a repair. Note which areas affect comfort, which are most visible, and how you want the cabin to look and feel. These priorities help you discuss luxury automotive leather bolster repair while keeping the vehicle’s overall finish in view.
Vanguard Motors Dubai can help you consider the right direction for your vehicle’s appearance and care. Share the affected area and what matters most to you, whether that’s preserving the current look or planning a broader refresh. A considered discussion can turn an upholstery concern into a practical next step.
Contact Vanguard Motors Dubai to discuss your repair. Take the next step with confidence and keep your interior aligned with the standard you expect.
Frequently Asked Questions
Can I start using my car immediately after restoration is completed?
No. Avoid heavy use of the repaired seat for the first 24 hours while the bond matures. For leather restoration, the recommended curing period is 24-48 hours. If you need to drive sooner, keep pressure and friction off the restored bolster where possible. For example, enter and exit carefully rather than sliding across the repaired edge, and follow the specific aftercare instructions provided for the finish.
Do you work on the seats inside the car or remove them?
The repair approach depends on the damaged area and the access needed. A surface repair on an accessible bolster may not require seat removal, while damage near a seam or concealed edge can call for a different approach. Describe the location clearly and share a photo showing both the damaged spot and the full seat to help establish a practical repair plan.
What does luxury automotive leather bolster repair involve?
Luxury automotive leather bolster repair restores a damaged seat edge while preserving as much of the existing upholstery as practical. The work may include inspecting the material, preparing the area, addressing a scuff, crack, or tear, blending the colour, and finishing the surface. First identify whether the bolster is leather or vinyl, since a seat can use both materials on different panels.
How much does luxury car leather seat bolster repair cost in the UAE?
The price depends on the case and is given after a quote request. The assessment considers the damaged area’s size and depth, the upholstery material, whether backing or seams are affected, and how much preparation and color blending the finish requires. For a more useful estimate, describe each affected seat and provide clear photographs. A surface scuff and a tear exposing backing involve different repair work.
Can a worn or torn leather bolster be repaired without replacing the seat cover?
Yes, a worn or torn bolster can often be restored without replacing the entire seat cover when the surrounding upholstery remains suitable for repair. The technician assesses the tear, exposed backing, nearby stitching, and adjacent material. A localized opening may be filled and blended, while widespread deterioration across several panels may call for a broader upholstery solution.
What is the difference between leather bolster repair, recoloring, and replacement?
Repair addresses physical damage such as a scuff, crack, or tear. Recolouring focuses on faded or uneven pigment, helping the affected area blend with the surrounding upholstery. Replacement fits new material over a larger section or seat. These options can overlap: a tear may need repair before its colour is restored. Compare the damage’s depth, spread, and location before deciding on the scope.
How long does luxury automotive leather bolster repair take?
A standard driver-side bolster repair typically takes between 2 and 3 hours. Larger or more complex damage can change the work involved, so repair time and curing time should be planned separately. For example, allow for the restoration work first, then keep the seat clear of heavy use during the recommended curing period. Ask for the expected handover time when arranging your vehicle drop-off.
What are the risks of DIY leather bolster repair on luxury vehicles?
A DIY attempt can leave visible colour differences, mismatched grain, an uneven topcoat, or a patch that stands out under cabin lighting. Residue from silicone or petroleum treatments can also interfere with adhesion. A small tear may look simple but expose backing that needs careful preparation. Test products on an inconspicuous area, and don’t treat a deep tear like a surface scuff.